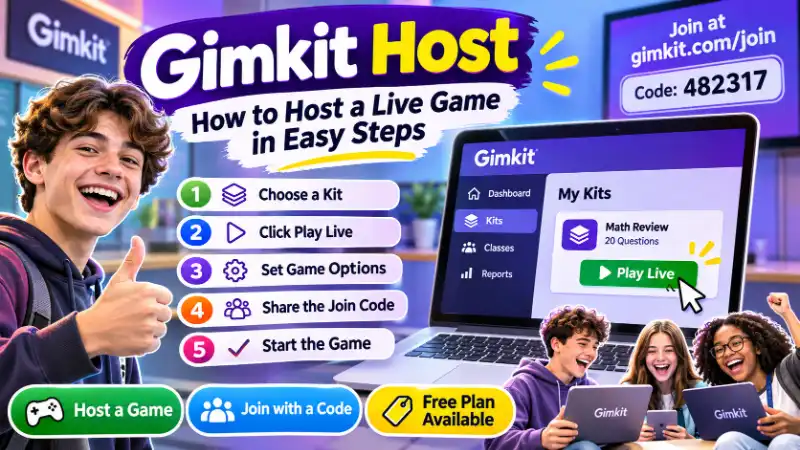
Want to host a Gimkit game but aren’t sure where to start? Maybe you can’t find the Play Live button, don’t know how to get a game code, or wonder if you need to pay before inviting your friends.
Good news. Gimkit Host lets you start live learning games, invite players, and manage the action from one place. Teachers can use it for classroom reviews, and students can host smaller games using their own accounts.
You don’t need to be a tech expert, either.
Quick Answer: To host a Gimkit game, sign in at Gimkit.com, choose a Kit, click Play Live, select a game mode, and adjust the settings. Then share the game code, link, or QR code from your lobby. Once everyone joins, click Start Game. Free accounts can host games, although some modes have limits.
Here’s how everything works, from opening your dashboard to fixing common hosting problems.
FIND YOUR AGE - IN YEARS, MONTHS, DAYS, HOURS & SECONDS!
Gimkit Host vs. Join: Which Page Do You Need?
Before you start clicking around, make sure you’re using the right part of Gimkit.
Hosting and joining aren’t the same thing.
A Gimkit host creates and runs a live game. The host chooses the questions, selects the game mode, invites players, and controls when the game begins or ends.
A player joins a game that someone else has already created.
This difference matters because the host and player use different starting points.
If You Want to Host, Start From Your Gimkit Account
To host a game, visit the official Gimkit website and sign in.
If you don’t have an account, select Sign Up and create one. You can register with Google or an email address.
Gimkit offers two account types: Educator and Student.
After signing in, you’ll reach your Gimkit dashboard. This is where you can access your Kits, manage learning activities, and start live games.
A Kit is a collection of questions and answers. For example, a teacher might create a Kit with 20 science questions for a classroom review.
Once you have a Kit ready, you’ll use the Play Live option to begin hosting.
You don’t need a separate website called “Gimkit Host.” Hosting is part of the official Gimkit platform.
If You Want to Play, Use the Gimkit Join Page
Maybe a teacher gave you a code and told you to join a Gimkit game.
In that case, you don’t need the host dashboard.
Instead:
- Open Gimkit.com/join.
- Enter the game code provided by the host.
- Follow the instructions on your screen.
- Join the game and wait for it to begin.
You may also receive a direct game link or QR code.
Students generally don’t need a Gimkit account to join a regular live game. That’s different from hosting, which requires an account.
Remember: If you want to create the game, use your Gimkit account. If someone has already created it, use the join page.
How to Host a Gimkit Game in 5 Steps
If you’ve been searching for how to host a Gimkit game, this is the part you need.
You can set up your first live game in five steps. The process works for educators, and student accounts follow a similar path with some limits.
Step 1 — Choose or Create a Gimkit Kit
First, log in to your Gimkit account.
On your dashboard, look for the Kits you’ve already created or saved.
A Kit contains the questions players will answer during the game.
For example, you could prepare a Kit about:
- Multiplication and division
- Science vocabulary
- U.S. history
- English spelling
- General knowledge
If you already have a suitable Kit, select it.
If you need a new one, use Gimkit’s Kit creation tools to add questions and correct answers.
You can also browse available Kits if you don’t want to write every question yourself.
Before starting, check that the questions make sense and the answers are correct.
A quick review now can save you from stopping the game later because of a mistake.
Step 2 — Click Play Live and Select a Game Mode
Once you’ve chosen your Kit, find the green Play Live button.
You can access it from your dashboard beside a Kit or from inside the Kit itself.
Click Play Live.
Gimkit will open its Mode Picker, where you can choose how the game works.
Some modes focus on answering questions and earning in-game money. Others use 2D worlds where players move characters around a map.
You may see modes such as Don’t Look Down, Snowbrawl, or other featured options, depending on what’s available.
Not sure which one to choose?
Select a mode and click Learn More to read its instructions.
For your first game, choose something that fits your group’s experience.
For example, if everyone is new to Gimkit, a simpler mode may be easier to explain than one with several moving parts.
After choosing the mode, click Continue.
Step 3 — Customize Your Game Options
Now you’ll see the Game Options screen.
This is where you decide how your live game should run.
The available settings depend on your selected mode, but common options include:
Game Goal: Choose what players need to accomplish before the game ends. Some modes use a timer, while others have different goals.
Join in Late: Decide whether players can enter after the game has started.
Nickname Generator: Let Gimkit generate player names instead of having everyone type their own. This option isn’t shown when using Classes.
Connect a Class: Link the game to a class you’ve set up in Gimkit.
Some 2D modes also let you change how many in-game rewards players receive for answering questions.
For a first game, keep things simple.
Choose a reasonable time limit, check the joining settings, and avoid changing options you don’t understand yet.
Then click Continue.
Step 4 — Share the Game Code, Link, or QR Code
After you finish the settings, Gimkit opens your game lobby.
This is where players gather before the game starts.
You’ll see a Gimkit host code on your screen. This code belongs to your live game session.
There are three common ways to invite players.
Option 1: Share the Game Code
Tell players to visit Gimkit.com/join and enter the code displayed in your lobby.
Option 2: Send a Direct Join Link
Click the game code on your host screen to copy a link directly to your game.
You can share that link with your group.
Option 3: Show a QR Code
Hover over the game code to display a QR code. Players can scan it with a compatible device.
For a classroom, displaying the QR code on a large screen may be the easiest choice.
If you’re hosting remotely, a direct link may be more convenient.
Keep your lobby open while everyone joins.
One important thing: Don’t search online for a random Gimkit host join code. Use the code from your own active game lobby.
Step 5 — Check the Lobby and Start the Game
You’re almost ready.
Look at the player names in your lobby. Make sure everyone who should be there has joined.
If you notice an unwanted player or an inappropriate name, Gimkit provides a way to remove that player.
In a 2D game, you can also choose whether to join as a player or watch as a spectator.
When everyone is ready, click Start Game.
In 2D modes, this button appears near the lower center of the lobby screen. In non-2D modes, it’s located toward the upper right.
The game will begin, and players can start answering questions and taking part in the selected mode.
That’s it. You’ve hosted your first Gimkit live game.
Is Gimkit Host Free? Basic vs. Pro Explained
You might think Gimkit requires a paid subscription before you can host games.
It doesn’t.
Gimkit Basic is free, and educators can host live games without buying Gimkit Pro.
However, the free plan doesn’t provide unlimited access to every game mode.
What Can You Do With Free Gimkit Basic?
A free Educator account gives you access to Gimkit Basic.
With it, you can:
- Create and manage Kits.
- Host live games using featured modes.
- Invite students to participate.
- Set up classes.
- Review available game reports.
- Keep using the free plan without a subscription.
Gimkit rotates its featured modes, so the free selection may change over time.
This means you might see a mode available for free one week and find a different selection later.
If your goal is to run a simple classroom quiz or review game, Gimkit Basic can be enough.
You don’t have to upgrade just to try live hosting.
What Does Gimkit Pro Add?
Gimkit Pro is the optional paid plan for Educator accounts.
It gives educators access to additional features, including:
- All Pro-exclusive game modes
- Assignments for independent practice
- Audio questions
- Image uploads for questions
New Educator accounts start with a 14-day Gimkit Pro trial. After the trial, they can continue using Gimkit Basic for free.
Here’s a simple example.
Suppose you want to review spelling words with your class. A featured game mode on Basic might handle that perfectly.
But if you want a particular Pro-exclusive mode or need to create an assignment, Pro may be necessary.
You can check the latest plan details in the official Gimkit Help Center.
How Many Players Can Join a Hosted Game?
The number of players depends on the account and game mode.
| Hosting situation | Maximum players |
|---|---|
| Standard live games | Up to 500 |
| 2D game modes | Up to 60 |
| Pro-exclusive modes on Gimkit Basic | 5 |
| Games hosted from student accounts | 5 |
These are Gimkit’s documented limits, not a promise that every game will run smoothly with the maximum number of players.
A strong internet connection still matters, especially for larger groups.
Also, the restrictions can overlap. For example, a student hosting a 2D game still has the student-account limit.
If only five players can join, check both your account type and the mode you’ve selected before assuming something is broken.
Can Students Host a Gimkit Game?
Yes. Students can host a Gimkit game using a Student account.
This surprises some people because Gimkit is often used by teachers in classrooms.
But student accounts can start live games, too.
If you’re wondering how to host Gimkit as a student, here’s what you need to know.
First, create or sign in to your Student account.
Next, choose a Kit and follow the same basic hosting process:
- Select a Kit.
- Click Play Live.
- Choose a game mode.
- Set the game options.
- Share the join code and start the game.
The biggest difference is the player limit.
A student account can host games for up to five players.
So, if you’re planning a small study session with a few friends, student hosting may work well.
But if you want to run a game for an entire classroom, an Educator account is more suitable.
Keep in mind that joining a game without an account doesn’t mean you can host one without an account.
Gimkit requires an account to create Kits and host live games.
Gimkit Host Controls: Manage Your Live Game
Starting the game is only half the job.
Once players begin, the host needs to keep things running smoothly.
Gimkit provides live controls that help you watch the session, manage players, and end the game when needed.
The controls you see can change depending on whether you’re using a 2D or non-2D mode.
View Players and the Leaderboard
During a live game, look for the host controls near the upper-right area of the screen.
You can use the available controls to view players, display the leaderboard, and adjust music or sound effects.
In non-2D modes, the leaderboard can be useful on a classroom projector because students can see how the game is progressing.
You can also manage players when needed.
For example, if someone joins with an inappropriate nickname, the host can remove that player from the lobby.
Some modes allow players to be removed during gameplay as well.
However, Gimkit’s Team Mode doesn’t support removing players in the middle of a game.
It’s a good idea to check the lobby before clicking Start Game.
Play or Spectate in 2D Game Modes
Have you ever wanted to join the game you’re hosting?
In Gimkit’s 2D modes, you can choose to participate as a player or watch as a spectator.
As a player, you control your own character and take part in the game.
As a spectator, you can observe other players and follow the action without playing in the same way.
This can be helpful for teachers who want to watch how students are doing.
For example, while students explore a 2D map, you can focus on helping anyone who gets stuck instead of competing with them.
Choose your role using the option shown in the lobby.
Adjust the Timer or End a Game Early
Sometimes a game takes longer than expected.
Maybe students need another minute to finish their activity.
In supported 2D modes, the host can click the game timer to add one minute at a time.
Gimkit’s maximum live-game duration is 59 minutes, with limits on when extra time can be added.
You can’t subtract time during an active game using that feature, and non-2D modes don’t have the same add-time control.
What if you need to stop immediately?
Use the End Game control.
This lets you close a live session before its normal goal is reached.
It’s useful when class time runs out or the group needs to move on to something else.
Why Can’t I Host or Join a Gimkit Game?
You followed the instructions, but something still isn’t working.
Maybe the Play Live button isn’t there. Maybe players can’t join. Or perhaps your school network keeps disconnecting.
These problems have different causes, so it’s worth checking them one at a time.
Play Live Button Is Missing
Problem: You signed in but can’t find the hosting option.
What to try:
First, make sure you’re using the official Gimkit website, not a third-party page that explains Gimkit.
Then open your dashboard and select a Kit.
Gimkit’s Play Live button appears beside Kits in the dashboard or inside an opened Kit.
If you haven’t created or chosen a Kit, start there.
Also, check that you’re signed in to the account you intended to use.
If the page looks different from the instructions, refer to Gimkit’s current official hosting guide.
Gimkit Host Login Isn’t Working
Problem: You can’t sign in to your hosting account.
What to try:
Check that you’re entering the correct email address and password.
If you normally use Google to sign in, try your usual Google sign-in method.
If you’ve forgotten your password, use Gimkit’s password recovery option.
Students who use school-managed Google accounts may face extra sign-in restrictions. In those cases, the school’s Google Workspace settings could be involved.
If you’re using a school account and the problem continues, ask a teacher or school IT administrator for help.
Remember, players joining a regular live game usually don’t need to log in at all.
Game Code Is Invalid or Players Can’t Join
Problem: Someone enters the Gimkit host join code but can’t get into the game.
What to try:
Start by checking the code shown in your current lobby.
Make sure the player typed it correctly and is using the official join page.
If the game has already ended, start a new session and share its current code.
If your game is running but a late player can’t enter, check whether Join in Late was turned off during setup.
You can also try sharing the direct game link instead of asking the player to enter the code manually.
If only one device is having trouble, check that device’s browser and internet connection.
Tip: A game code and a Kit are not the same thing. Your Kit holds the questions, while the live session provides the join code.
A Game Mode or Player Limit Is Blocking Hosting
Problem: You can’t invite as many people as expected.
Before changing accounts or creating another Kit, check the limits.
If you’re hosting from a Student account, the maximum is five players.
If you’re on Gimkit Basic and selected a Pro-exclusive mode, that mode is also limited to five players.
For larger free games, use one of the featured modes available to Basic Educator accounts.
Remember that 2D modes have their own 60-player maximum.
Choosing the right mode before inviting everyone is much easier than fixing a player-limit problem after your friends are waiting.
Gimkit Is Not Connecting on School Wi-Fi
Problem: Gimkit loads, but the live game won’t connect or players keep getting disconnected.
First, check whether other websites are loading properly.
Then visit Gimkit’s connection test.
This page checks whether your connection can reach services Gimkit needs.
You can also check Gimkit’s server status to see whether the platform is reporting a service problem.
If the connection test fails only on your school network, the school’s firewall or proxy may be blocking part of Gimkit.
Gimkit uses secure WebSocket connections to communicate with its game servers. Some school networks need configuration changes to allow them.
Share the official connection troubleshooting instructions with your school IT team rather than trying to change network security settings yourself.
Where to Find Your Gimkit Game Report
Your live game is over, but you still want to know how everyone performed.
Did students understand the lesson? Which questions caused the most trouble?
Gimkit reports can help answer those questions.
When you host a Kit that you own, Gimkit provides a report with information about the game.
After the session ends, click View Report.
In 2D modes, the button appears near the lower-left corner of the end-game screen. In non-2D modes, it’s near the upper right.
You can also find previous reports from your dashboard.
Open the Reports tab or visit Gimkit.com/reports.
Gimkit organizes live-game reports into three main views.
Student Overview: Look at performance information for individual students.
General Overview: Review the overall game results.
Question Breakdown: See how players performed on specific questions.
For example, suppose most students missed the same fraction question.
Instead of replaying the whole lesson, you could spend a few minutes explaining that particular concept.
You can also save report information as a PDF.
One detail matters: Gimkit’s official guidance says live-game reports are provided after hosting a Kit you own. Don’t assume every game using someone else’s Kit will create the same report access.
Frequently Asked Questions About Gimkit Hosting
Can You Host a Gimkit Game Without an Account?
No. Gimkit requires an account to create Kits and host live games.
You can create a free account if you don’t already have one.
However, students can usually join someone else’s live game without signing in.
So, playing without an account is possible, but hosting without an account isn’t part of Gimkit’s official process.
Can You Host Gimkit From Home?
Yes. You can host a Gimkit live game from home if you have a working internet connection, a compatible browser, and a Gimkit account.
You can share your game link or code with friends who are joining remotely.
You don’t need to be physically inside a classroom to use Gimkit’s live hosting features.
For a small study group, make sure everyone has the correct link before starting.
Can You Reuse the Same Gimkit Kit for Another Game?
Yes. A Kit can be used for multiple live game sessions.
You don’t have to rewrite your questions every time you want to play.
Open the Kit again, select Play Live, choose your mode, and start another session.
This is handy when different classes need to review the same topic.
You can also choose a different game mode for a new session while keeping the same question set.
Does Every Gimkit Game Have a Permanent Host Code?
No. The code you share is connected to a live game session, not permanently attached to the Kit.
When hosting another game, check the new lobby for the current code.
Don’t assume an old code will work for a future session.
If players tell you their code doesn’t work, ask them to use the latest join link or code from your active lobby.
Ready to Host Your First Gimkit Game?
Hosting a Gimkit game is pretty simple once you know where everything is.
Sign in, choose a Kit, click Play Live, pick a mode, and share the code from your lobby. Once your players arrive, start the game and use the host controls when needed.
You can begin with Gimkit Basic without paying, and student accounts can host smaller games with up to five players.
Start with a short game, get comfortable with the controls, and try another mode when you’re ready.
Ready to begin? Visit Gimkit.com and host your first live game.
BMI & BMR CALCULATOR - CHECK YOUR HEALTH









1 thought on “Gimkit Host: How to Host a Live Game, Share Codes, and Play for Free”